
How to Drill Into a Quartz Countertop
If you’ve always wondered how to drill a hole into your quartz countertop, follow the below guidelines.
One of the most durable and versatile materials, quartz is used in both exterior and interior design projects throughout the world. This engineered material is made from approximately 95 percent natural materials combined with a polyester resin to make it that much more durable.
Today, engineered quartz is used to make countertops, walls, and floors in a variety of styles and finishes. Some homeowners may be looking to save money on home projects they can complete on their own, including drilling a hole in their quartz countertop.
If you’ve always wondered how to drill a hole into your quartz countertop, follow the below guidelines.
Drilling Into Quartz
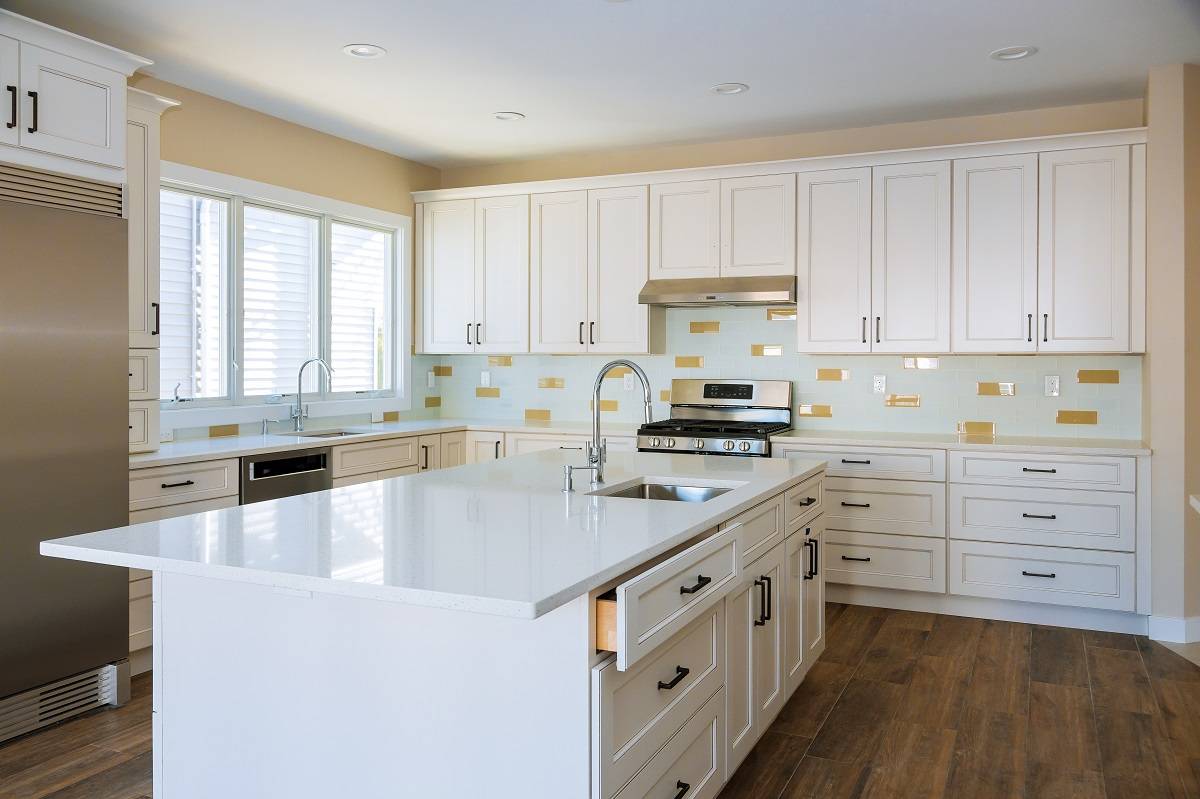
Quartz countertops are known for their durability, making them a popular option in high-traffic areas over other materials such as granite. The quartz manufacturing process consists of using a seal to help keep the countertop intact and beautiful for years to come.
Its durability, combined with its versatility, makes quartz one of the most popular countertop options in kitchens, sinks, laundry rooms, and more. In addition, quartz doesn’t absorb moisture because it’s a non-porous material, making it easy to maintain. Despite how durable these countertops are, it’s still essential to put in the work to maintain them.
The sheer durability of quartz means that drilling into it requires the right tools in order for the project to be a success. Without the right equipment or a steady hand, you may make a costly mistake. Only take on this project if you are willing to compile the right tools and if you feel confident in your at-home handy skills.
How to Drill Through a Quartz Countertop
Use the following step-by-step guide to help you drill through your quartz countertops.
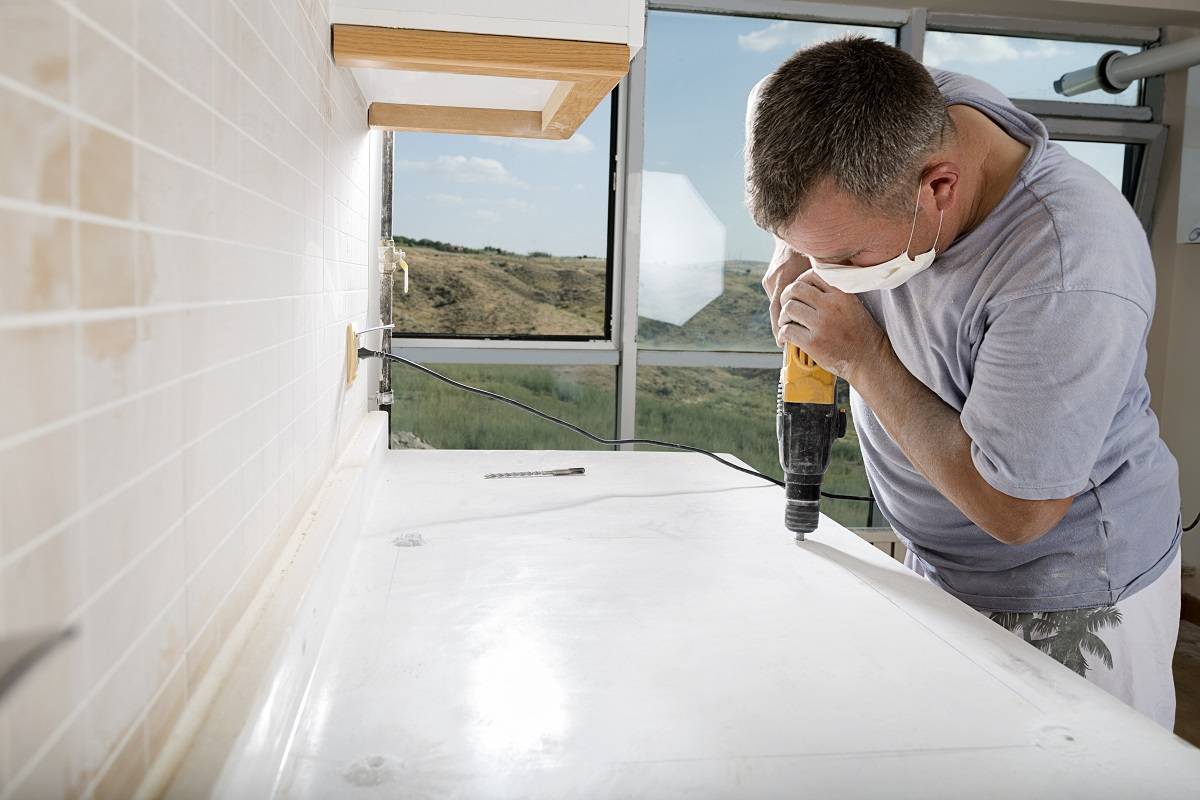
Step #1: Gather the Tools You Need

If you make a mistake by using the wrong tools for cutting your quartz countertops, there’s no subtle way to hide your mistake. Be sure to compile these tools before you get started:
- Diamond-tipped drill bits
- A cordless drill
- Safety glasses
- Modeling clay
You may wonder whether you can opt for a standard metal drill bit instead of purchasing the more expensive diamond-tipped drill bits. In this case, the metal drill bits will not be strong enough to cut through the quartz without causing damage. Using a metal drill bit will likely result in chips, cracks, or breaks in your counters.
Don’t cut corners on your drill bit, as this will be the main component in this project. You can also look into whether or not you can rent professional-grade drill bits from your local home improvement store.
Step #2: Prepare for Drilling
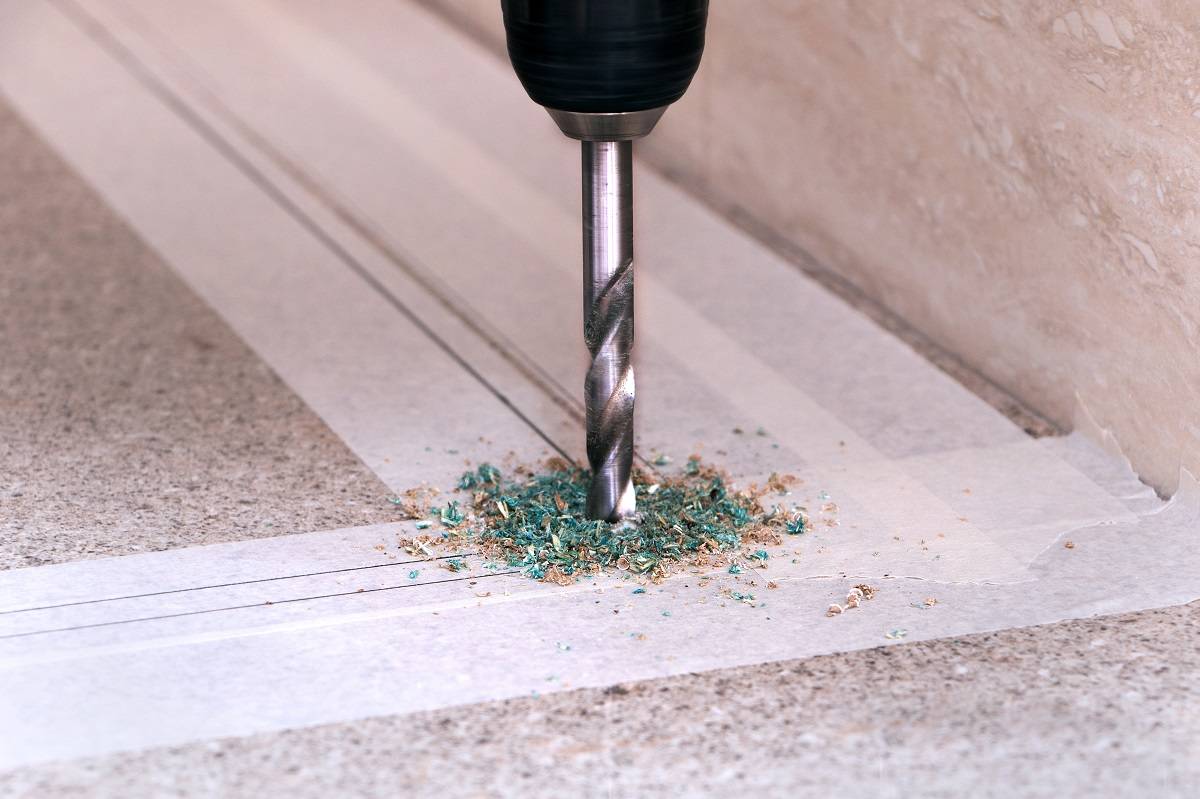
Once you have the right tools, prepare the area for drilling to help minimize distractions while you’re focusing on the task. Place a bucket beneath the area that you’ll be drilling to catch any debris and water, and prepare a cup of water that you can use to pour over the counter while you drill. The water will help keep the drill bit dry while you’re cutting.
Step #3: Position the Template and Start Drilling
You’ll also want to use a template to outline where you’ll need to drill your hole. This will help keep your measurement accurate to ensure the hole is in the right spot.
Hold this template in place with one hand, and position the drill in the other. Slowly begin to drill into the countertop with even, consistent movement. You don’t need to worry about applying excess force. Let the powerful drill bit do the work for you.
Every 15-20 seconds, take your cup or bottle of water and pour it over the drill bit. Doing so will prevent the bit from overheating.
As a pro tip, remember not to rush this process! You may feel as though you need to get the drill bit through the granite quickly, but be slow and steady in the drilling process to avoid rushed mistakes or sudden movements.
Step #4: Remove the Template
After the initial hole has been drilled into your quartz countertop and the hole is ¼ inch deep, turn off the drill and remove the template.
Step #5: Remember to Cool Down the Drill
To keep the drill from overheating, use modeling clay to create a dam around the hole. You can fill this area halfway with water to keep the drill bit lubricated while you’re working.
Step #6: Keep Drilling

From there, keep steadily drilling and adding water as necessary to follow the outline of your template. A slow and steady approach is best, as this is not a project you want to rush.
Step #7: Reduce Drill Speed and Finish the Job
As the end of the hole approaches, start to wind down the speed of the drill. Make sure that the drill is only making enough contact to cut the hole. Precision is key in preventing the formation of any chips or cracks.
Step #8: Clean Up the Debris and Put the Tools Away
Wipe away any excess countertop or modeling clay debris and clean up any spilled water. Put the tools back where they belong and step back to admire your hard work! You’ll be proud of your ability to tackle this DIY home project.
Do I Go DIY or Hire a Professional?
Let’s face it; working on your own quartz countertops can be intimidating. One small misstep and your countertops can suffer from the consequences. If you feel hesitant about taking on such an important task alone, there’s no harm in having a professional cut a hole in your quartz countertops instead.
Despite this, many homeowners take pride in completing tasks independently, seeing each unique job as a challenge they can work to overcome. If you’re willing to put in the research, time and get the right tools, this is a task that you may feel confident taking on yourself.
Conclusion
Quartz is a stunning addition to any space, and with the right tools and knowledge, you can feel confident drilling holes into your quartz countertops. If you’re unsure of your skills and don’t want to risk causing damage, call an experienced professional.
If you need help with other aspects of your kitchen remodeling project, our local professionals at Pro Stone Countertops would love to be of assistance. All of our work is completed in-house, meaning we are your one-stop-shop for design, stone fabrication, and installation. With a combined 100 years of experience and speedy turnaround times, trust our experts to get the job done right the first time.
